· Matthew Watt · Series · 8 min read
Fable Reminders - Part 1
Build a reminders app completely in F#. In part 1, we get our base project setup so we're ready to hit the ground running building in F#!

Overview
Now, I know what you’re thinking. Everyone builds to-do apps for their tutorial. And in response, dear reader, I say: I embrace the fact that I am clichéd 😎
Disclaimer:
Before following this series, you should be fairly comfortable with web technologies such as:
- HTML - Even though we’re using F# to generate our markup, being familiar with HTML will make this much easier to follow.
- CSS - specifically, Tailwind
- npm - we’ll be using it to manage the dependencies on the JavaScript side of this project.
This series also assumes you have some familiarity with F# and its syntax. I will explain some syntax and language features along the way, but this is by no means a “fundamentals of F#” series. For that, I recommend checking out Scott Wlaschin’s website F# for Fun and Profit or a book like F# in Action by Isaac Abraham.
With that out of the way, let’s begin.
Our toolkit
In this series, we’re going to learn how to build a frontend web app in F#. The tools we’ll be using are:
Fable - an F#-to-Javascript transpiler
Elmish - a frontend framework for building robust, testable applications inspired by the Elm language
Tailwind - for styling
FontAwesome - for nice icons
Vite, the so called “Next Generation Frontend Tooling”
vite-plugin-fable - An alternative approach to integrating the Fable compiler with Vite.
We’ll also be using Feliz and Elmish.React, which are packages that allow you to use a domain-specific language (DSL) for expressing your views which then get rendered using React as a view engine.
Dependencies
The first thing we want to do is get our dependencies in place. To follow along with this series, you will need the following installed in your development environment:
- .NET 6 or newer
- NodeJS - latest LTS release should do (22.11.0 at the time of writing)
Note for VSCode users:
If you are using VSCode to follow along, you should also install the Ionide Plugin for F#. It provides things like syntax highlighting, auto completions, F# interactive integration, and much, much more. It’s a must-have for F# development.
Scaffolding the project
The project has two parts:
- The JavaScript side
- The .NET side
The .NET side consists of a solution and project that will house the F# code we will be writing. The F# code will eventually be compiled to JavaScript that will get run on the JavaScript side.
The glue that connects the two together is vite-plugin-fable. We’ll learn more about this in a moment.
For now, let’s start with the JavaScript side.
The JavaScript side
We’re going to use npm to scaffold a basic vite project. To start, fire up your favorite terminal. I’m going to be using zsh, but these commands should work fine in any Unix-based system, as well as PowerShell. Type in the following:
npm create vite@latestIf you’ve never used Vite before, you may see the following:
Need to install the following packages:
create-vite@x.x.x
Ok to proceed? (y)
Hit enter to proceed.
Next, we’ll be asked to enter some information about the project we are creating. Enter the following:
? Project name: › fable-remindersFor framework, we’ll choose React, since that will be our view engine:
? Select a framework: › - Use arrow-keys. Return to submit.
    Vanilla
    Vue
❯   React
    Preact
    Lit
    Svelte
    Solid
    Qwik
    Angular
    Others
For variant, JavaScript is fine, since F# will be our statically-typed language of choice:
? Select a variant: › - Use arrow-keys. Return to submit.
    TypeScript
    TypeScript + SWC
❯   JavaScript
    JavaScript + SWC
    Remix ↗
Once you finish the variant selection, the script should scaffold out a basic Vite template configured with React and vanilla JavaScript. Open the folder in your favorite editor, and let’s take a look at what we have. I will be using VSCode:
code ./fable-remindersIf you look at the folder structure, this is what you should see:
/public          # Static assets, like images, CSS, or script files
/src             # All the source code will live here
.gitignore       # Used by git to specify which files we don't care to track
eslint.config.js # Config file used by ESLint
index.html       # The entry point for the entire application
package.json     # Description of the project and all its dependencies, used by npm
README.md        # A basic README template provided by Vite
vite.config.js   # Config file used by Vite
You’ll also see files within public and src, but you can just delete them. We won’t be using them. You can also delete eslint.config.js. We won’t have any JavaScript/TypeScript to lint - we’re writing F#!
Next, we need to make some modifications to index.html:
<!doctype html>
<html lang="en">
  <head>
    <meta charset="UTF-8" />
-   <link rel="icon" type="image/svg+xml" href="/vite.svg" />
    <meta name="viewport" content="width=device-width, initial-scale=1.0" />
-   <title>Vite + React</title>
+   <title>Fable Reminders</title>
  </head>
  <body>
-   <div id="root"></div>
+   <div id="app"></div>
-   <script type="module" src="/src/main.jsx"></script>
+   <script type="module">
+     import '/src/Program.fs';
+   </script>
  </body>
</html>
Here, we’re doing the following:
- Removing references to deleted files.
- Changing the page’s title to “Fable Reminders”
- Changing the
idof the main<div>from"root"to"app"- just my preference - Modifying the
<script>to import an F# file we haven’t created yet.
Don’t worry about any errors or warnings generated by that import. We’ll address those when we create the .NET side of the project.
Next, we’ll setup Tailwind and FontAwesome.
Create a new file called index.css in the root project folder (same level as index.html) and add the following snippet:
@tailwind base;
@tailwind components;
@tailwind utilities;

html {
  background-color: black;
}
Then, update index.html as follows:
<!doctype html>
<html lang="en">
  <head>
    <meta charset="UTF-8" />
    <meta name="viewport" content="width=device-width, initial-scale=1.0" />
    <title>Fable Reminders</title>
+   <script src="https://cdn.tailwindcss.com"></script>
+   <script src="https://kit.fontawesome.com/bc531ee529.js" crossorigin="anonymous"></script>
+   <link rel="stylesheet" type="text/css" href="index.css" />
  </head>
  <body>
    <div id="app"></div>
    <script type="module">
      import "/src/Program.fs"
    </script>
  </body>
</html>
That should be everything we need on the JavaScript side for now. Let’s move on to the .NET side!
The .NET side
First up, let’s create a new solution. In the root project folder, run the following:
dotnet new sln -n FableRemindersThat will generate an empty solution file. Next, the project.
Run the following:
dotnet new console -lang F# -n App -o ./src
dotnet sln add ./src/App.fsproj
This will create an F# console application template and add it to our solution.
With that, we are almost ready to start writing F#. Let’s open up src/App.fsproj file and examine its contents:
<Project Sdk="Microsoft.NET.Sdk">

  <PropertyGroup>
    <OutputType>Exe</OutputType>
    <TargetFramework>net8.0</TargetFramework>
  </PropertyGroup>

  <ItemGroup>
    <Compile Include="Program.fs" />
  </ItemGroup>

</Project>
A pretty standard project file. Go ahead and remove the <OutputType> entry, as the Fable compiler will not use it.
Next, let’s add the dependencies on the .NET side using the .NET CLI.
Within the src directory, run the following:
dotnet add package Fable.Elmish.React
dotnet add package Feliz
That should be it for the .NET side. Now, we just have to glue the two parts together!
Gluing it together
Let’s start by opening our package.json file and examining its contents:
{
  "name": "fable-reminders",
  "private": true,
  "version": "0.0.0",
  "type": "module",
  "scripts": {
    "dev": "vite",
    "build": "vite build",
    "lint": "eslint .",
    "preview": "vite preview"
  },
  "dependencies": {
    "react": "^18.3.1",
    "react-dom": "^18.3.1"
  },
  "devDependencies": {
    "@eslint/js": "^9.13.0",
    "@types/react": "^18.3.12",
    "@types/react-dom": "^18.3.1",
    "@vitejs/plugin-react": "^4.3.3",
    "eslint": "^9.13.0",
    "eslint-plugin-react": "^7.37.2",
    "eslint-plugin-react-hooks": "^5.0.0",
    "eslint-plugin-react-refresh": "^0.4.14",
    "globals": "^15.11.0",
    "vite": "^5.4.10"
  }
}
This is what Vite scaffolded for us out-of-the box. Let’s make some adjustments:
{
  "name": "fable-reminders",
  "private": true,
  "version": "0.0.0",
  "type": "module",
  "scripts": {
    "dev": "vite",
    "build": "vite build",
-   "lint": "eslint .",
    "preview": "vite preview"
  },
  "dependencies": {
    "react": "^18.3.1",
    "react-dom": "^18.3.1"
  },
  "devDependencies": {
-   "@eslint/js": "^9.13.0",
-   "@types/react": "^18.3.12",
-   "@types/react-dom": "^18.3.1",
-   "@vitejs/plugin-react": "^4.3.3",
-   "eslint": "^9.13.0",
-   "eslint-plugin-react": "^7.37.2",
-   "eslint-plugin-react-hooks": "^5.0.0",
-   "eslint-plugin-react-refresh": "^0.4.14",
-   "globals": "^15.11.0",
    "vite": "^5.4.10"
  }
}
We can remove the lint script, since we won’t be using it, and we can remove all of our devDependencies except for Vite.
Next, let’s install the glue, vite-plugin-fable, by running the following in the root project folder:
npm i -D vite-plugin-fableThat can take a while, so grab a cup of coffee while you wait.
Once that is done, all that’s left is to configure the plugin. Open up vite.config.js and make the following changes:
+ import path from "node:path";
+ import { fileURLToPath } from "node:url";
  import { defineConfig } from 'vite'
+ import fable from "vite-plugin-fable";
- import react from '@vitejs/plugin-react'
+
+ const currentDir = path.dirname(fileURLToPath(import.meta.url));
+ const fsproj = path.join(currentDir, "src/App.fsproj");

  // https://vite.dev/config/
  export default defineConfig({
-   plugins: [react()],
+   plugins: [fable({ fsproj })],
  })
This is essentially the default config pulled from the plugin documentation. The main difference is that since our fsproj file is in a different location than the root project, we have to tell vite where it is, which is exactly what this is doing.
With that, we should finally be ready to fire up the project. In the root project folder, run:
npm run devOpen your favorite browser to http://localhost:5173 and you should see the following:
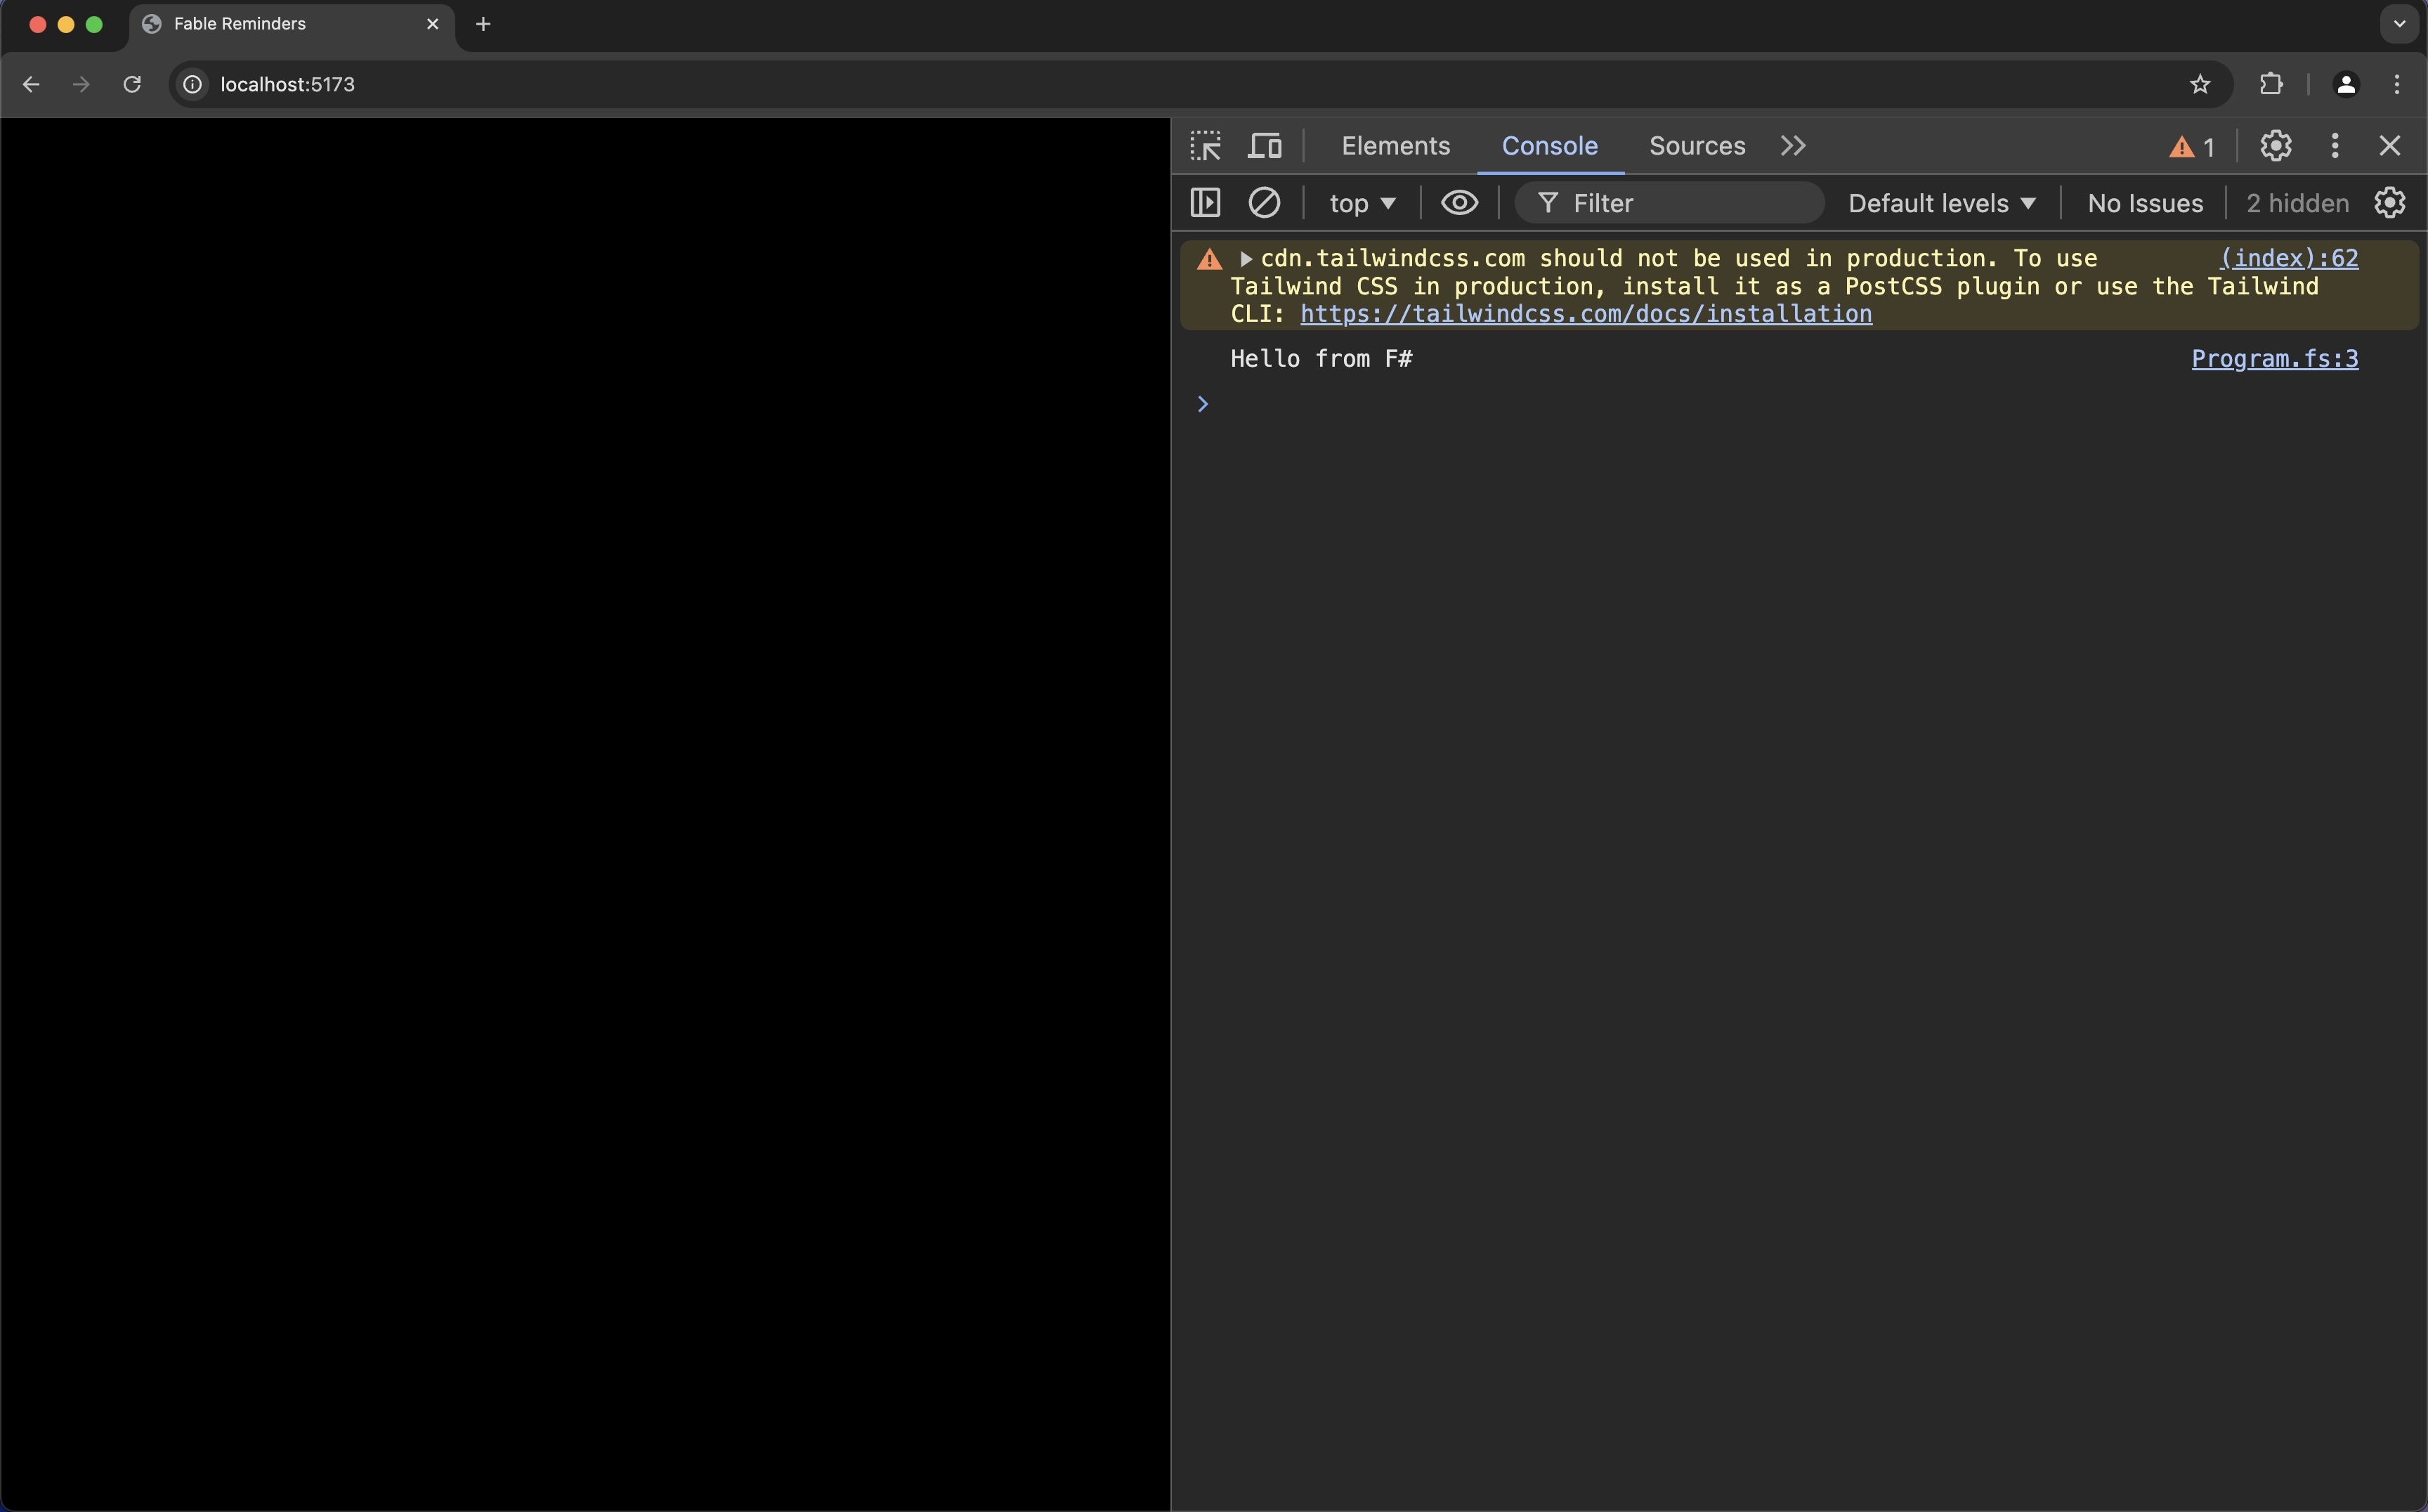
See that console log? It’s no lie - it came from an F# file! Open up src/Program.fs to prove it to yourself:
// For more information see https://aka.ms/fsharp-console-apps
printfn "Hello from F#"
Pretty cool. It will be cooler when we write our entire app in F#! Speaking of our app, here’s our end goal:
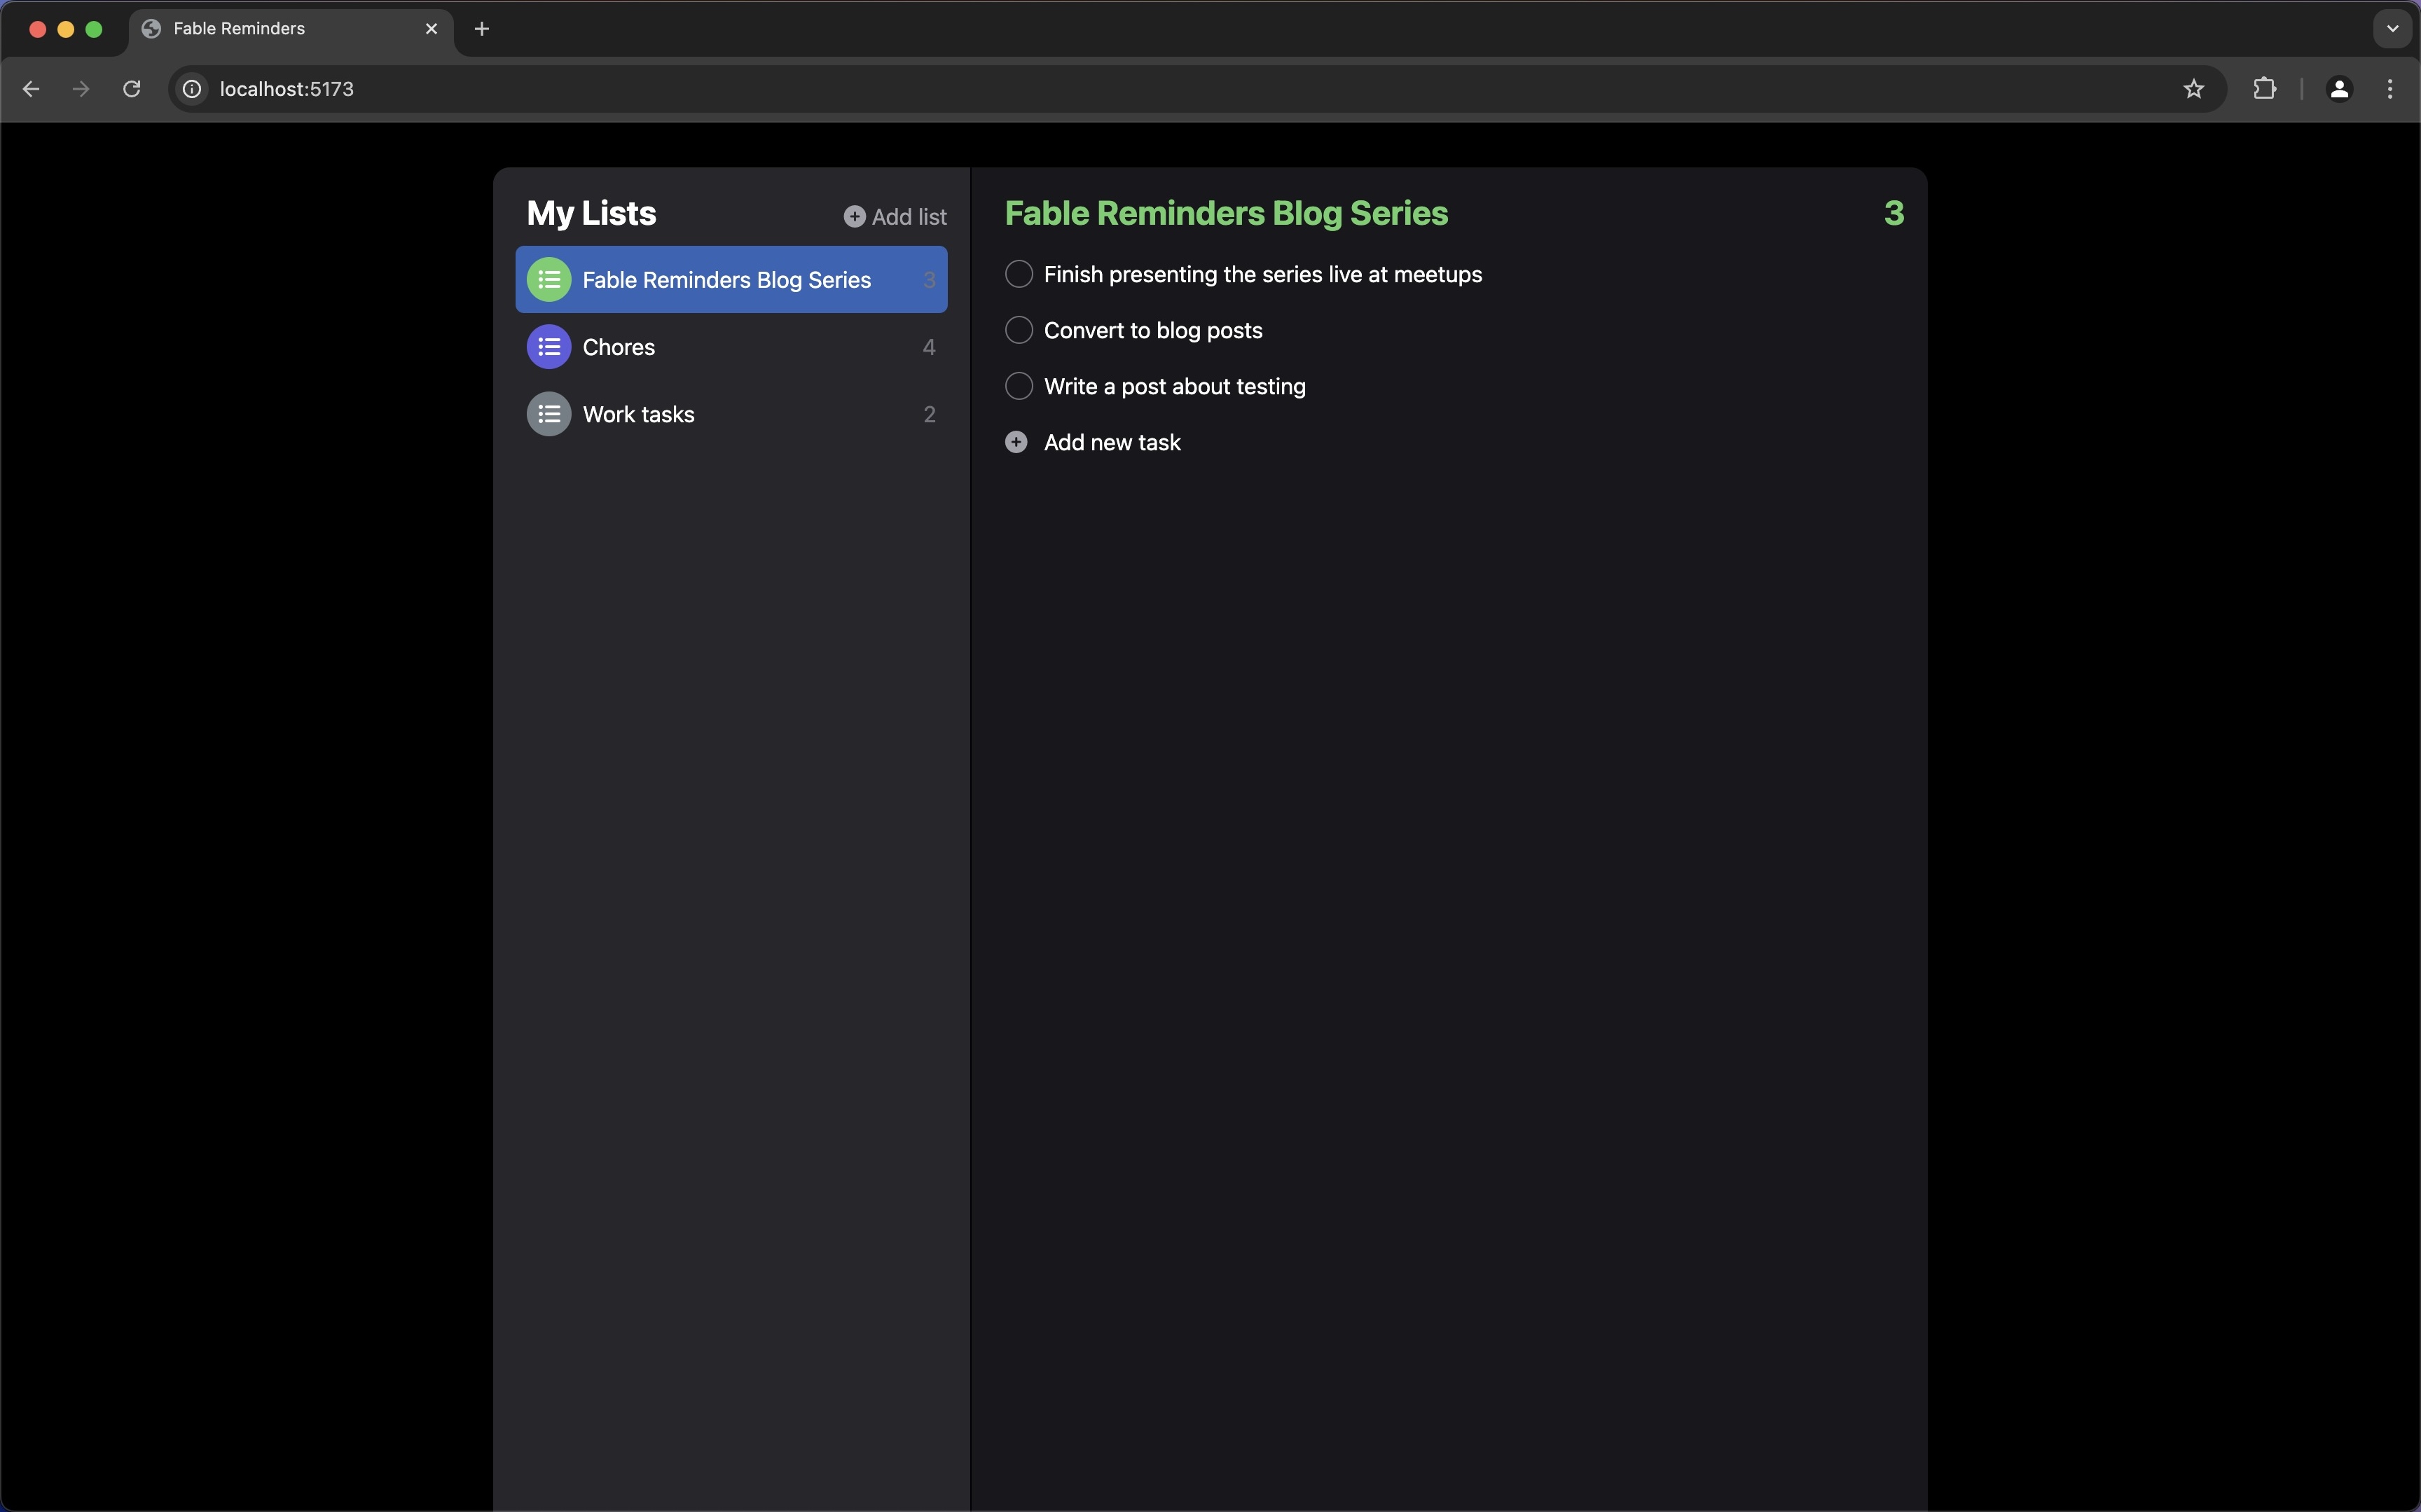
By the end of this series, we’ll be able to add lists, add reminders, and mark them as completed or not completed. We’ll even source our data from an API! It’s pretty simple, but it’s enough to give you a taste of what web development using F# looks like!
Conclusion
In part 2, we’ll learn about F#‘s type system by modeling our application’s domain using algebraic data types! We’ll also learn about the main components of an Elmish application by bootstrapping our application. In the meantime, you can find the completed code for this post here.
Happy coding!